Hello there! Today I’m excited to share a guide on using cloud images in Proxmox. If you’ve ever found yourself repeatedly creating VMs and going through the same configuration steps, this post is for you! We’ll explore how to leverage cloud images with cloud-init for automated VM deployments - it’s like having a personal VM chef that prepares your instances exactly how you like them.
What We’re Working With
Before we dive in, here’s what we’ll be using in this guide:
- Proxmox version 8.3.0 (the star of our show)
- Ubuntu 22.04 (our trusty workbench)
- A cup of coffee (optional but recommended)
Image Prep: Getting Everything Ready
First things first - we need to prepare our cloud image. We’ll be working on an Ubuntu host because, well, Proxmox and libguestfs-tools don’t play nice together (they’re like cats and cucumbers). The libguestfs-tools package is our magic wand here - it lets us modify images without even booting them up!
Let’s start by grabbing a fresh cloud image:
curl -O https://cloud-images.ubuntu.com/releases/jammy/release/ubuntu-22.04-server-cloudimg-amd64.img
Now, let’s get our tools ready:
sudo apt install libguestfs-tools -y
Here comes the interesting part - we’re going to install the qemu-guest-agent into our image. This little helper allows Proxmox to peek inside the VM and manage it better:
sudo virt-customize -a ubuntu-22.04-server-cloudimg-amd64.img --install qemu-guest-agent
Time to move our prepared image to its new home:
scp ubuntu-22.04-server-cloudimg-amd64.img root@proxmox:/tmp/
The Proxmox Dance: Setting Up Our Template
Now we’re getting to the good stuff! Let’s create a VM that will serve as our template:
qm create 9022 \
  --name ubuntu-2204-cloud-init --numa 0 --ostype l26 \
  --cpu cputype=host --cores 2 --sockets 8 \
  --memory 8192  \
  --net0 virtio,bridge=vmbr0
Import our prepared image to storage:
qm importdisk 9022 ubuntu-22.04-server-cloudimg-amd64.img SSD
Let’s hook up the disk (SCSI style):
qm set 9022 --scsihw virtio-scsi-pci --scsi0 SSD:vm-9022-disk-0
Now for the cloud-init magic - this is what makes our VM configurable on boot:
qm set 9022 --ide2 SSD:cloudinit
Make sure our VM knows where to boot from:
qm set 9022 --boot c --bootdisk scsi0
Add a serial console (some cloud images get chatty and need this):
qm set 9022 --serial0 socket --vga serial0
Enable our friendly neighborhood guest agent:
qm set 9022 --agent enabled=1
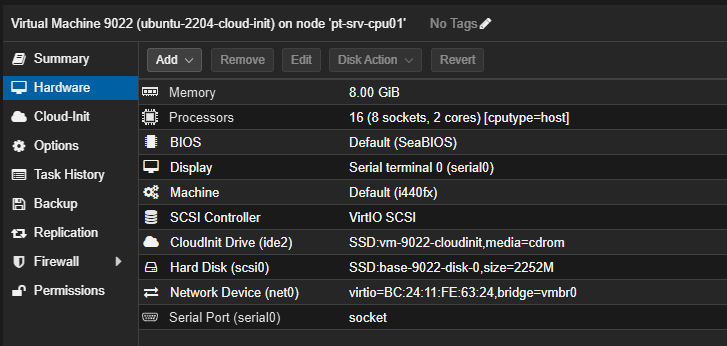
Here is the finaly summary of our VM configuration:
Time to make this VM a template (it’s graduation day!):
qm template 9022
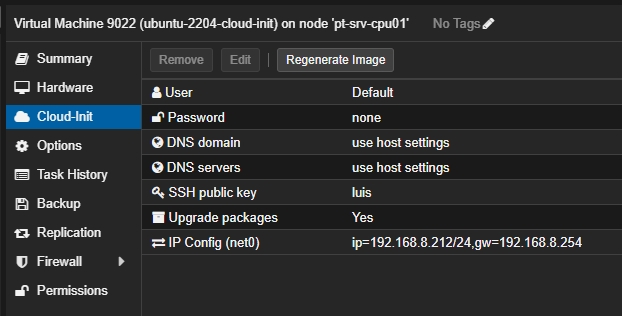
Let’s give it our SSH key - no more password prompts:
qm set 9022 --sshkey ~/.ssh/luis.pub
And for testing purposes, we’ll assign it a static IP:
qm set 9022 --ipconfig0 ip=192.168.8.212/24,gw=192.168.8.254
And there you have it - our cloud-init template ready to rock!
Creating Your First Cloud-Init VM
Now for the moment of truth - let’s create a VM from our template:
qm clone 9022 999 \
  --name ubuntu-test \
  --full \
  --storage local-zfs
Once it boots up, you can SSH right in using the default username (ubuntu for Ubuntu cloud images) and the SSH key we configured. No muss, no fuss!
Why This is Awesome
This setup is particularly handy because:
- Your VMs come pre-configured with your SSH keys
- No need to go through installation wizards
- Perfect for automation with tools like Terraform (stay tuned for that post!)
- Consistent VM deployments every time
Wrapping Up
And there you have it! A streamlined way to deploy VMs in Proxmox using cloud images and cloud-init. No more clicking through installers or manually configuring each VM - just clone and go! In a future post, I’ll show you how to take this even further with Terraform automation.
Until then, happy virtualizing! 🚀
P.S. If you run into any issues, remember the IT golden rule: “Have you tried turning it off and on again?” (Just kidding, but sometimes it actually works!)